What's Your Word My Intent Project
Microsoft Word may not be a full-fledged graphics program, but you can use its layout, font, text box, and other features to make, surprisingly, exceptional custom holiday cards with a little clever manipulation and some creativity. You can use images or clipart from your own collection, download royalty-free images from the web, or use Shapes and Special Effects in Word to draw your own custom images.
Note: If you're planning to use envelopes (as opposed to a postcard-type design), note that the paper size may be determined by the size of the envelope. So, choose your envelopes first, then create your project.
Designing envelopes in Word
1. Because envelopes are generally wider than tall, open a blank Word document, and select Page Layout > Orientation > Landscape.
2. Next, select Page Layout > Size > More Paper Sizes.
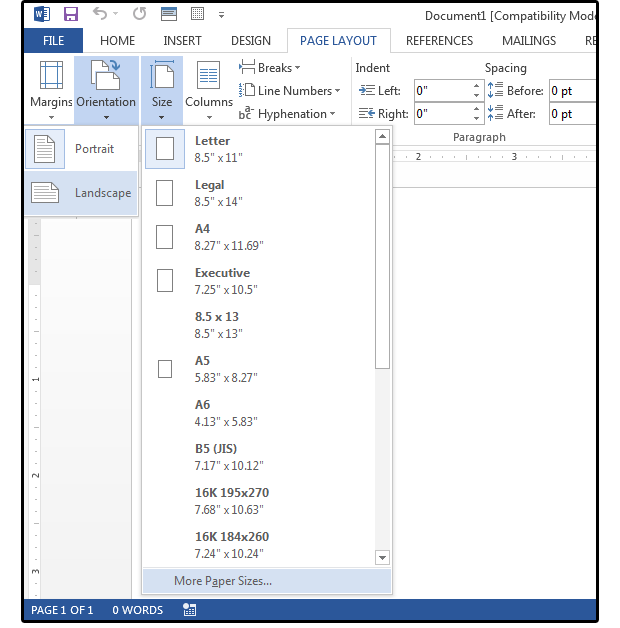 JD Sartain
 Select Orientation and Paper Size
3. Under Paper Size on the Page Setup screen, scroll down to the envelope section. Note that there are five preset options, plus an option to create a custom-sized envelope. The presets are as follows:
a. #10 Envelope: 9.5 inches wide x 4.13 inches tall
b. Envelope Monarch: 7.5 inches wide x 3.88 inches tall
c. Envelope B5: 9.84 inches wide x 6.93 inches tall
d. Envelope C5: 9.02 inches wide x 6.38 inches tall
e. Envelope DL: 8.66 inches wide x 4.33 inches tall
f. Custom: any size you like
Most greeting card sizes are about 5 x 7 inches with an A7 (5.25 x 7.25-inch) envelope; about 4.5 x 6.125 inches (or 4 x 6 inches) with an A6 (4.75 x 6.5 inches) envelope; or 4.25 x 5.5 inches with an A2 (4.375 x 5.75 inches) envelope. Office supplies and stationery stores sell all of these sizes and more; however, it's still a good idea to buy the envelopes first, then design the product.
4. Select the Custom paper size from the Page Setup Screen, then enter a width of 7.25 inches and a height of 5.25 inches (this is for a card size of 5 x 7 inches). ClickOK. Notice that the envelope now appears on your screen.
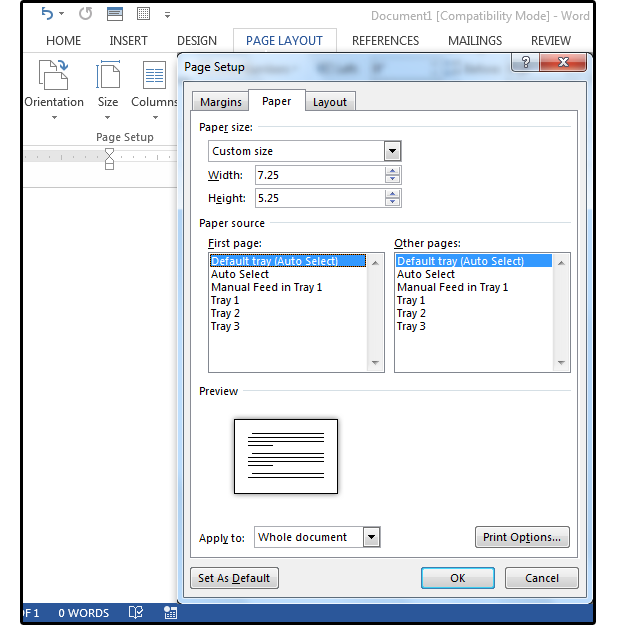 JD Sartain
 Choose a preset paper size or create a custom size envelope
Note: If you use Word to create your envelopes, you can mail-merge your mailing list from any ASCII/CSV database, from your Outlook Address Book, or from your phone. Our story on mail merge using an Excel database offers more information on this process.
5. Change the margins on the envelope to 0.5 inches on all sides.
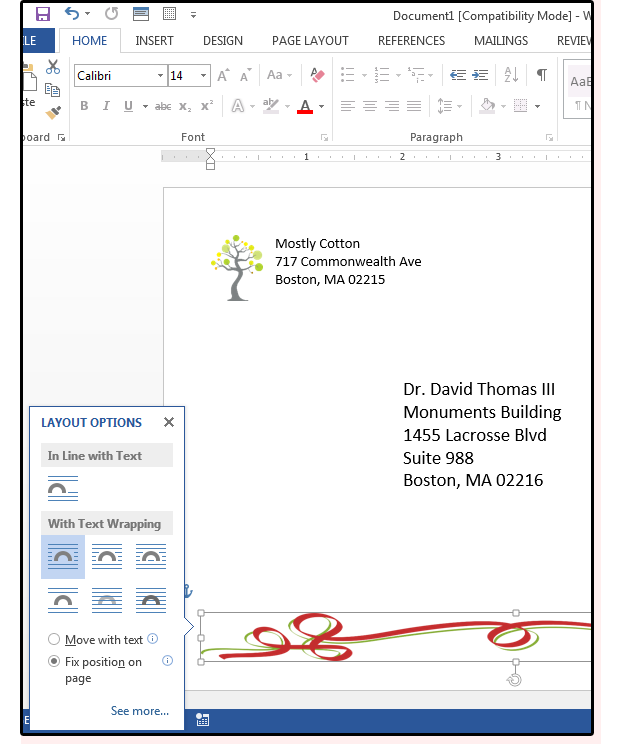
6. Select Insert > Pictures, browse to your corporate logo, then click the Insert button. Size the logo to fit three to four lines. Modify the font to match your corporate branding and choose a larger size such as 14 to 18 point.
7. Click the Layout Options icon button, then choose the first icon under With Text Wrapping, and check the radio button: Fix Position on Page. The cursor moves to the right, top side of the logo.
8. Enter your company's address, then press the Enter key six times.
Insert your corporate logo and return address
9. Press the Indent key (not the Tab key) four times, then enter the recipient's information. If you're unhappy with the spacing, highlight the entire address and press the Increase Indent key or Decrease Indent key until you're satisfied with the spacing.
10. Now, be creative and add a festive, decorative border along the bottom. Select Insert > Online Pictures, type Christmas bottom border in the Search box, and press Enter. Select one that looks festive, and click Insert.
11. Size the graphic, stretch to make larger or smaller, then center it on the page or envelope. When the icon button appears, choose the first icon under With Text Wrapping, and check the radio button: Fix Position on Page.
 JD Sartain
 Select a festive border, then size it and center it at the bottom of the envelope
Cards, invitations, announcements in Word
1. Because we selected a 7.25 x 5.25-inch envelope, the card/invitation/announcement size will be 5 inches by 7 inches in portrait or landscape, whichever you prefer.
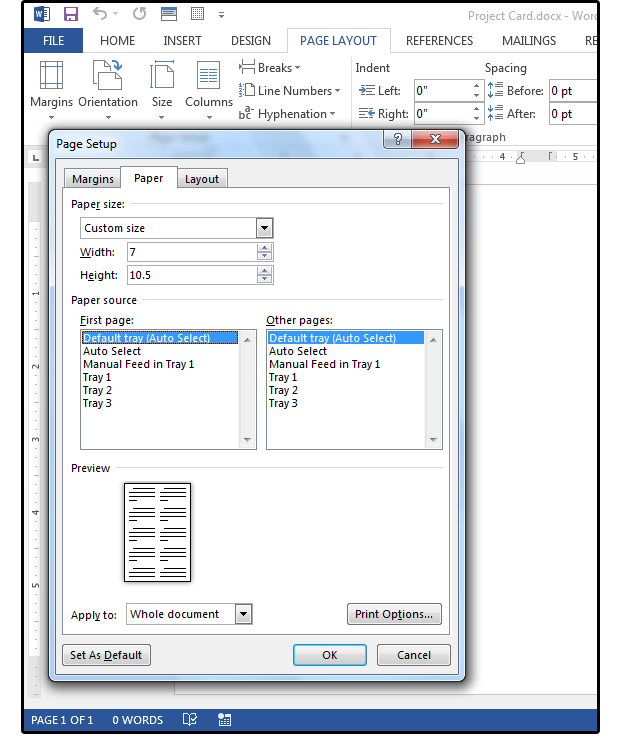
2. Open a new blank Word document. Select Page Layout > Size > More Paper Sizes.
3. Select the Custom paper size from the Page Setup Screen or just enter the height and width of your custom card (in this case, 10.5 inches wide x 7 inches tall), then click OK.
4. Next, change the Orientation to Landscape. For a 5×7 folding card, you'll need 10.5 inches width (5 inches for each side plus 0.5 inches for the fold).
 JD Sartain
 Create a custom card
Notice that the blank card now appears on your screen. Also note, that one page is the front and back (side by side), and the next page shows the inside pages.
5. Select Insert > Shape and choose the line shape, then draw a line from the top of the card to the bottom at 5.25 inches. This helps keep the two sides balanced. Copy the line to Page 2 for the inside of the card. Don't worry, you can always delete these lines after your card is finished.
6. Enter a 0.5 inch margin on all sides.
 JD Sartain
 06 Draw a vertical line to separate front, back, + inside pages
7. Create your card design on the right side of the page. Anything you place on the left side will be on the back of the card. Enter your message first. Choose a font, size it, then center or justify your greeting on the left or right side of the page. You can also turn your text sideways.
8. Choose a festive font for the Happy Holidays (such as AmoreATT) with a font size that almost touches the right and left borders, such as 48 points. Change the "auto" leading to 48 inches under Home > Paragraph > Indents and Spacing > Line Spacing> with a leading size of 48. This moves the two words closer together vertically.
 JD Sartain
 Enter a festive font; choose a size, spacing, color and/or special effects, and then alter the leading
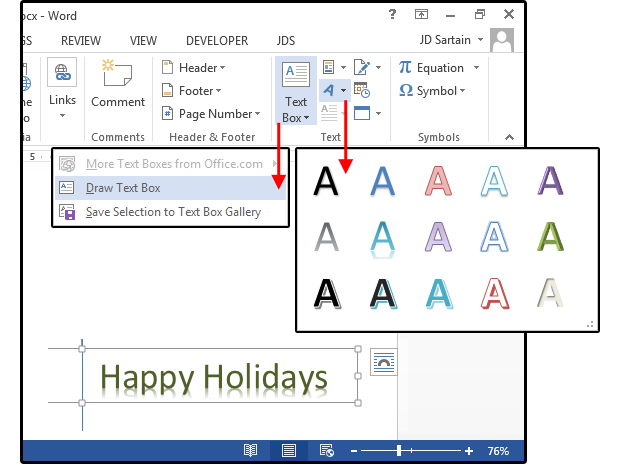
9. Unlike graphics programs, you cannot just pick up the greeting and move it anywhere you like on the page. If you use regular page text, it's confined to the lines on the page. However, you can also use Word Art or a Text Box. Just select Insert > Word Art, then choose a style from the sample box; or select Insert > Text Box> Draw Text Box. With both selections, enter your greeting text, then choose a font, style, color, size, leading, spacing, and justification.
Hint: The Text Box option is definitely the easiest to work with because you can move and position the Text Box anywhere you like on the page, easily make lines of text as close or as far away from each other as needed, stack Text Boxes on top of one another, and rotate the text in any direction.
 JD Sartain
 08 Insert line text, Word Art, or a Text Box
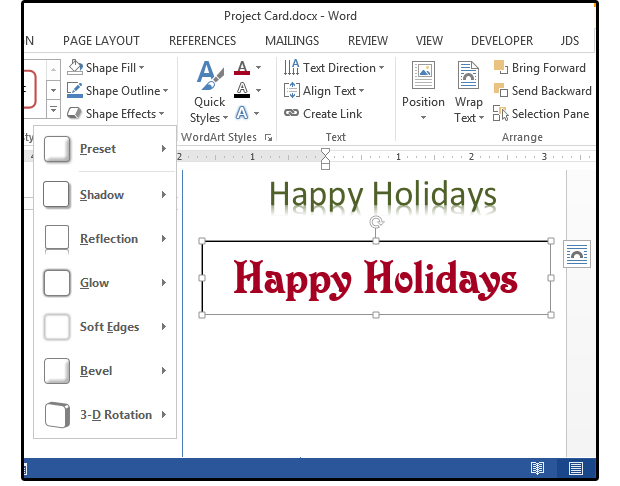
10. Notice that when the Text Box is selected, the Ribbon changes and displays the Drawing/Format menu. Use the features to edit the text or change the color, size, and other attributes, or to add some special effects to your greeting such as Shadow, Reflection, or Glow.You can also add or remove borders or shading to the Text Box itself.
 JD Sartain
 Select the Text Box and decorate your text message
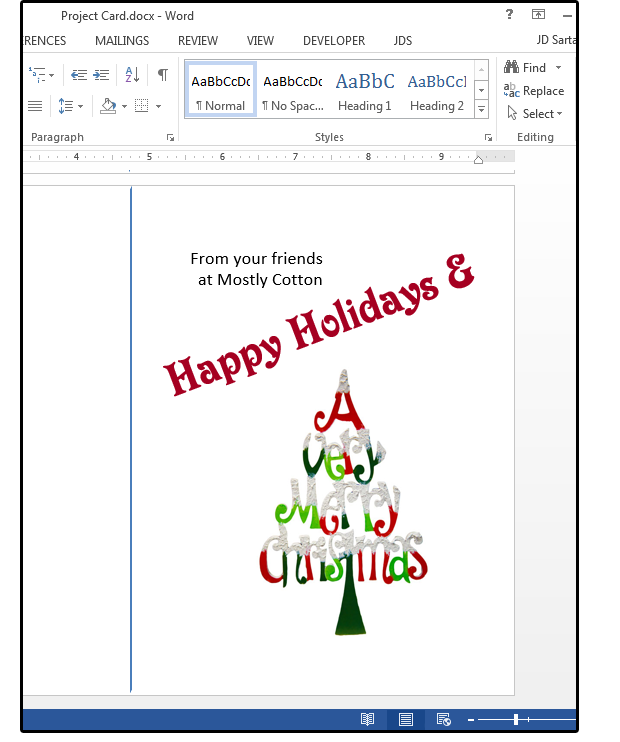
11. Next, add and size your images.
12. And last, enter your inside greeting text (follow the instructions above to add another text box for your message), then size and position to fit the page/card.
13. Play around with different fonts and images. Have some fun with it.
14. When finished, Save and Print. Don't forget to print page 2 on the back of page 1.
 JD Sartain
 Finish, Save, and Print
What's Your Word My Intent Project
Source: https://www.pcworld.com/article/3146255/use-word-to-create-holiday-cards-and-projects.html
0 Response to "What's Your Word My Intent Project"
Post a Comment